
How do you measure u bolts?
Replacing suspension hardware requires absolute precision; a U-bolt that is off by even a fraction of an inch can compromise the entire leaf spring assembly.
To measure a U-bolt correctly, you must determine four specific dimensions: the rod diameter, the inside width between the legs, the inside length of the legs, and the thread pitch. Accurately capturing these metrics ensures the bolt will fit the axle saddle and maintain the necessary clamping force without mechanical interference.

Before you order replacements or advise your clients, it is critical to understand not just how to measure, but what you are actually measuring. Let’s break down the definitions and the process.
What is a U bolt?
A U-bolt is the primary fastener used to secure a leaf spring pack to the vehicle’s axle, acting as the critical anchor for the suspension system.
It is a U-shaped industrial fastener with threaded legs, designed to clamp the leaf springs firmly against the axle seat to prevent shifting during acceleration and braking.

Dive Deeper: The Role of Materials and Dacromet Coating
While the shape of a U-bolt is simple, its role in the suspension system involves handling immense dynamic loads. When a truck hits a pothole or corners sharply, the U-bolt is subjected to high tensile stress and shear forces. If the U-bolt loosens or fails, the leaf spring can shift, leading to dangerous axle misalignment and loss of vehicle control.
However, mechanical strength is only half the battle. In the automotive aftermarket, particularly for chassis parts, environmental resistance is equally critical. U-bolts sit at the lowest point of the chassis, constantly exposed to road debris, moisture, mud, and corrosive road salts. This is where GSW Autoparts differentiates its manufacturing process.
Standard U-bolts often use basic electro-galvanization, which offers minimal protection and can sometimes induce hydrogen embrittlement in high-strength steels—a phenomenon where the metal becomes brittle and prone to cracking under stress.
At GSW, we utilize Dacromet (zinc-flake coating) technology for our premium U-bolt lines. Dacromet is a water-based, inorganic coating that provides superior corrosion resistance through a mechanism known as Sacrificial Anode Protection. Unlike traditional plating, the zinc flakes in the Dacromet coating sacrifice themselves to protect the steel substrate from oxidation. Furthermore, the curing process of Dacromet does not involve acid pickling, effectively eliminating the risk of hydrogen embrittlement. This ensures that the Fatigue Life of the bolt remains uncompromised, even after years of exposure to harsh winter road salts. When you select a U-bolt, you aren’t just measuring dimensions; you are selecting a lifespan.
How to measure a u bolt?
Measuring a U-bolt is a standardized process, but using the wrong reference points is a common error that leads to returns and installation delays.
The correct sequence involves identifying the type of bend (Round, Semi-Round, or Square), then measuring the Rod Diameter, Inside Width, and Leg Length.

Dive Deeper: Visualizing the Process
The theoretical knowledge of measuring bolts is straightforward, but seeing it in action clarifies the nuance.
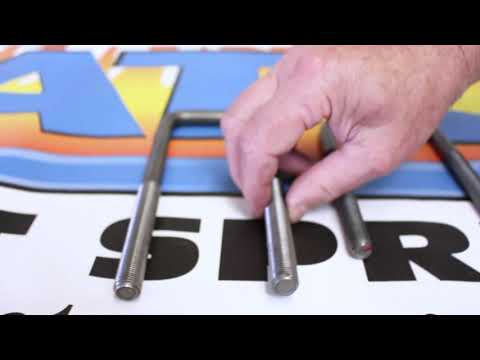
I recently watched a video by EATON Detroit Spring titled "Measuring U-Bolts – One Minute Monday". In this concise guide, the presenter strips away the complexity and focuses on the most critical aspect: defining the "Inside Width." The video does an excellent job of demonstrating that you simply cannot guess these measurements. A visual check isn’t enough; you need a tape measure or calipers. The video reinforces that U-bolts are not "one size fits all," and assuming a standard size based on the vehicle model alone can be risky due to aftermarket modifications.
Sales Enablement: Explaining "Set" vs. "Live" Measurements
When explaining this to a car owner or a junior mechanic, it is important to clarify the state of the old U-bolt. Old U-bolts that have been on a vehicle for years may have undergone plastic deformation or stretching.
- Rust Jacking: Rust between the threads can distort diameter readings.
- Spread: The legs might have splayed open slightly upon removal.
Therefore, when we teach customers how to measure, we advise them to measure the mating parts (the axle tube diameter or the saddle width) if the old U-bolt is too damaged or bent to get an accurate reading. This ensures that the new GSW part will fit the vehicle as it sits today, not just how it was built at the factory.
Measure the Width of the Legs
This is the single most common failure point in ordering U-bolts; measuring the wrong reference points results in parts that physically will not fit over the axle.
Always measure the Inside Width (the distance between the inner legs), NEVER the center-to-center distance.

Dive Deeper: The Physics of Fitment
Why do we emphasize "Inside Width" so aggressively? From a Mechanic’s View, the U-bolt must slide over a static object—usually the axle tube or a leaf spring saddle. These objects have a fixed outer diameter. If you measure the U-bolt from "Center-to-Center," you are including half the thickness of the rod in your measurement.
For example, if you have a U-bolt with a 1/2-inch rod diameter and you measure 3 inches Center-to-Center, the actual space available for the axle is only 2.5 inches (3 inches minus 0.25" for each leg half). If your axle is 3 inches wide, that U-bolt will never fit. It will jam against the sides of the axle tube, and no amount of hammering will seat it correctly without damaging the threads or the rod coating.
Furthermore, in manufacturing, we deal with "spring-back1." When we bend high-strength steel rods2 into a "U" shape, the metal naturally wants to return to its straight form. Precise tooling is required to ensure the legs remain parallel. If a customer measures a used U-bolt where the legs have sprung open (splayed) after removal, they might order a size too wide.
Pro-Tip for Accuracy: If the legs are bent or splayed, measure the width at the bend (the top of the U), not at the tips of the legs. The bend is structurally stiffer and retains the original dimension more accurately than the open ends.
Check Leg Length
The leg length determines if you will have enough thread to engage the nut fully or if the bolt will be too long and interfere with other chassis components.
Measure from the highest point inside the bend down to the very end of the threaded leg.

Dive Deeper: Torque and Thread Engagement
Leg length is not just about physical clearance; it is directly tied to safety and Torque application.
- Too Short: This is a critical safety hazard. If the leg is too short, the nut may not fully engage all the threads. For a secure hold, the bolt should extend through the nut by at least 2-3 threads. If the nut is only half-on, the shear strength of the threads is halved, leading to stripped threads under suspension load.
- Too Long: While "too long" is safer than "too short," it introduces installation headaches. Excessive length requires a deep-well socket for installation. If the socket isn’t deep enough, the mechanic cannot tighten the nut to the specified torque spec because the socket bottoms out on the bolt stud. This leaves the U-bolt loose, causing NVH (Noise, Vibration, Harshness) issues and eventual leaf spring breakage.
Additionally, we must consider the "Thread Length." The entire leg is not threaded. There is a smooth portion and a threaded portion. You must ensure the threaded portion is long enough to accommodate the thickness of the leaf spring pack, the U-bolt plate, the washers, and the nut. If the threads stop before the nut contacts the washer, you will "run out of threads" (shank out). You will feel like the nut is tight, but you are actually just tightening the nut against the unthreaded shoulder of the bolt, leaving the spring pack loose. This is a catastrophic installation error.
Determine Diameter
The rod diameter dictates the tensile strength of the U-bolt and must match the holes in the U-bolt plate.
Use calipers to measure the diameter of the smooth rod section, avoiding the threaded area which can give false readings.

Dive Deeper: Strength Grades and Tensile Strength
The diameter of the rod is directly proportional to its Tensile Strength and clamping force. A common misconception is that "bigger is always better." While a thicker rod is stronger, it must fit through the existing holes in the top plate and the bottom saddle. Drilling out these holes to fit a larger bolt can weaken the structural integrity of the mounting plates.
When measuring diameter, precision matters.
- Threads vs. Rod: Threads are formed by rolling, which can displace metal. The major diameter (peaks of the threads) is usually slightly larger than the pitch diameter, but the smooth rod is the true indicator of the stock material size used.
- Imperial vs. Metric: A 1/2-inch rod (12.7mm) and a 12mm rod are very close visually but are not interchangeable. A 12mm nut will obviously not fit on a 1/2-inch bolt.
At GSW Autoparts, our engineering team uses CAE Analysis (Computer-Aided Engineering) to determine the optimal rod diameter for specific load ratings. We ensure that the steel grade (often SAE Grade 5 or Grade 8 equivalent, or Metric Class 10.9) matches the diameter to provide the necessary yield strength without adding unnecessary weight. The diameter measurement you take ensures you are replacing "like for like" in terms of load-bearing capacity.
Thread Pitch Measurement
The final piece of the puzzle is ensuring the nut will actually screw onto the bolt.
Determine the thread count per inch (TPI) for imperial bolts, or the distance between threads (pitch) for metric bolts.

Dive Deeper: The Science of Fasteners
Thread pitch is often overlooked until the very end, leading to frustration when the old nuts don’t fit the new bolts (though you should always use new deep nuts with new U-bolts).
- Coarse vs. Fine: U-bolts typically use Fine Thread (UNF) rather than Coarse Thread (UNC). Why? Fine threads have a larger minor diameter (making the bolt stronger) and a lower helix angle. This lower angle provides better resistance to vibration, meaning the nut is less likely to back off under the constant shaking of the road.
- Metric vs. SAE: In the global market, distinguishing between a 1.5mm metric pitch and 16 TPI (Threads Per Inch) is difficult with the naked eye. They look almost identical.
Sales Enablement: The Thread Gauge Tool
We highly recommend that our distributors and mechanic partners use a simple Thread Pitch Gauge. It’s a small tool with serrated teeth that match specific pitches.
- Attempt to mate the gauge teeth with the bolt threads.
- If light shines through the gap, it’s the wrong pitch.
- If it fits snugly like a puzzle piece, you have confirmed the measurement.
Forcing a nut onto the wrong thread pitch generates heat and friction, often welding the nut to the bolt (galling) before it is even tight. This requires cutting the bolt off and starting over. Accurate measurement here saves hours of labor.
Conclusion
Measuring a U-bolt correctly—focusing on Inside Width, Leg Length, Diameter, and Thread Pitch—is the only way to ensure a safe and seamless suspension repair. By choosing GSW Autoparts, you aren’t just getting the right dimensions; you’re getting the added durability of Dacromet coating and certified strength grades.
Would you like me to generate a comparison chart of common U-Bolt sizes and their corresponding GSW part numbers for your next catalog update?
About the Author
Root is a Content & Operations Specialist at GSWAUTOPARTS with 5 years of industry experience. Leveraging his close proximity to our manufacturing floor, Root specializes in documenting product details and production processes. He focuses on translating technical insights about rubber and chassis parts into clear, helpful information for our customers.


