
How to remove a bushing from control arm?
Struggling with a stiff steering wheel or clunking suspension noises? Worn bushings often cause these headaches. Learn how to identify symptoms and master the removal process to restore your vehicle’s original handling and safety performance effectively.
Removing a control arm bushing requires either a hydraulic press or a specialized C-clamp tool to safely push the rubber component out of its metal housing. While DIY methods exist, using the right equipment prevents damaging the control arm itself, ensuring a precise fit for your new high-quality GSW replacement parts.

The removal process is a critical maintenance task that bridges the gap between diagnosing a shaky ride and restoring factory-grade NVH levels.
Why Are Control Arm Bushings Important?
Control arm bushings serve as the critical pivot points between the vehicle’s frame and the suspension, allowing for vertical movement while maintaining alignment.
These components are essential for isolating road noise and vibrations, ensuring that the driver experiences a smooth, controlled ride regardless of surface conditions.

Dive Deeper Section:
From a materials science perspective, the control arm bushing is far more than just a piece of rubber. It is a sophisticated dampening unit designed to manage multi-axial loads. At GSW, we prioritize the use of high-grade Natural Rubber in our formulations. Unlike cheaper synthetic blends that harden and crack prematurely, our natural rubber compounds provide superior elasticity and thermal stability. This is particularly vital when considering Shore Hardness A ratings; we calibrate the hardness to strike a perfect balance between steering precision and impact absorption.
When a vehicle corners, the bushing undergoes significant torsional stress. If the material is too soft, the suspension geometry shifts, leading to "steering wander." If it is too hard, every pebble on the road is transmitted into the cabin as NVH (Noise, Vibration, and Harshness). Our engineering team utilizes CAE Analysis to simulate these stress patterns before a single mold is poured. This ensures that the Vulcanization process creates a permanent, inseparable bond between the rubber and the inner/outer metal sleeves. By optimizing the natural rubber content, we extend the Fatigue Life of the part, allowing it to withstand millions of cycles of compression and rebound without losing its structural integrity. For B2B clients, this translates to fewer warranty claims and higher end-user satisfaction, as the "like-new" feel of the vehicle persists long after the installation.
What Happens When Control Arm Bushings Go Bad?
When these components fail, the physical connection between the wheel assembly and the chassis becomes compromised, leading to unpredictable vehicle behavior.
Worn bushings result in excessive "play," causing symptoms like clunking sounds over bumps, uneven tire wear, and a noticeable pull during braking or acceleration.

Dive Deeper Section:
The safety consequences of driving with compromised bushings cannot be overstated. When the rubber undergoes significant degradation—often characterized by deep cracks or "tearing" from the metal sleeve—the suspension’s dynamic geometry fails. This means your wheel’s toe and camber angles are constantly shifting while you drive. This instability directly impacts the vehicle’s braking distance and Electronic Stability Control (ESC) effectiveness.
In a professional CAE Analysis, we observe that a failed bushing causes "dynamic alignment change1." For example, under hard braking, a torn front control arm bushing allows the wheel to shift backward. This sudden movement can cause the vehicle to dart to one side, forcing the driver to make emergency corrections. Furthermore, the loss of dampening means that other components, such as ball joints and struts, take the brunt of road impacts, drastically shortening their service life. This creates a "domino effect" of suspension failure. When explaining this to a car owner, focus on the cost-benefit: replacing a $30 bushing now prevents a $1,000 repair bill for tires and steering racks later. High-quality GSW parts are designed to maintain their profile even under extreme load, ensuring that the safety systems of the vehicle work exactly as the original manufacturer intended.
How to Check Control Arm Bushings?
Identifying a faulty bushing early requires a combination of visual inspection and physical load testing to reveal hidden internal tears.
Inspect the rubber for visible dry rot or separation from the metal; then, use a pry bar to check for excessive movement within the joint.

Dive Deeper Section:
From the mechanic’s view, a "visual only" inspection is often insufficient. A bushing might look intact while under no load, but the moment the vehicle’s weight is applied, internal voids become apparent. The "Pry Bar Test" is the industry standard for assessing Fatigue Life. By inserting a pry bar between the control arm and the subframe, a technician can simulate road forces. If the arm moves more than a few millimeters, or if you hear a "squelching" or metallic "clack," the internal bonding has failed.
Another pro-tip involves observing tire wear patterns. "Feathering" or cupping on the inner edge of the tire is a classic sign that the bushings are no longer holding the arm in its calibrated position during travel. We recommend checking these components every 20,000 miles, especially in regions with extreme temperature fluctuations, which can accelerate the aging of lower-quality rubber. GSW bushings are tested for ozone resistance and extreme temperature cycles to ensure that our Shore Hardness A remains consistent from -40°C to 120°C. When a technician chooses a GSW part, they are choosing a component that has been validated for real-world durability, ensuring the inspection they perform today doesn’t have to be repeated six months down the line.
How to Remove Control Arm Bushings Without a Press?
While a hydraulic press is ideal, many technicians and DIYers use alternative methods like a C-clamp press or a threaded rod assembly to remove bushings.
You can remove a bushing by using a heavy-duty C-clamp and correctly sized sleeves to "screw" the bushing out of the arm’s bore manually.

Dive Deeper Section:
I recently watched a practical guide by Riggs Garage that perfectly illustrates the finesse required for this task. The video demonstrates that even without a 20-ton industrial floor press, the principles of mechanical advantage remain the same: you must apply even pressure to the outer metal sleeve of the bushing without deforming the control arm’s eyelet.
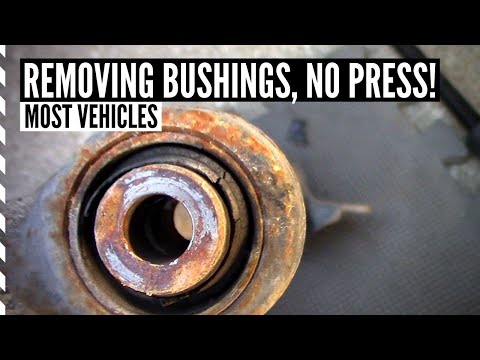
Using a threaded rod or a C-clamp requires selecting a receiving cup that is slightly larger than the bushing’s outer diameter and a driving cup that is slightly smaller. The danger of "without a press" methods is the risk of cocking the bushing at an angle, which can score the internal surface of the control arm. If the bore is damaged, the new bushing will not have the required interference fit, leading to premature failure or annoying squeaks.
At GSW, we manufacture our bushings with precision-machined outer sleeves. This ensures that the tolerance between the bushing and the arm is exactly within OEM specifications, making the "press-in" and "press-out" process much smoother for the technician. We often tell car owners: "The quality of the part makes the labor easier." A GSW bushing slides in with consistent force because our CAE Analysis2 accounts for the thermal expansion of the arm during operation. Whether you are using a professional press or a manual tool, the dimensional accuracy of a GSW part ensures a secure, quiet, and long-lasting fit.
Conclusion
Mastering bushing removal is key to maintaining vehicle stability. By choosing GSW parts, you benefit from high-grade natural rubber and precision engineering that simplifies installation and maximizes service life. Ready to upgrade your inventory or fix your ride? Contact GSW Autoparts today for professional-grade suspension solutions.
About the Author
Root is a Content & Operations Specialist at GSWAUTOPARTS with 5 years of industry experience. Leveraging his close proximity to our manufacturing floor, Root specializes in documenting product details and production processes. He focuses on translating technical insights about rubber and chassis parts into clear, helpful information for our customers.


