
What does a bad strut mount look like?
Identifying a worn strut mount is critical for maintaining vehicle safety and ride comfort, yet it is often overlooked during routine inspections. Ignoring these components can lead to expensive suspension damage and compromised handling, but knowing the visual and auditory warning signs can save you time and money.
A bad strut mount typically exhibits visible physical degradation, such as cracked or crumbling rubber, severe corrosion on the metal plate, or separation between the rubber and metal components. Additionally, if the mount sits unevenly or appears off-center within the strut tower, it indicates internal structural failure requiring immediate replacement.

While visual cues are the most direct evidence of failure, the symptoms of a bad strut mount often manifest in the vehicle’s behavior before you even pop the hood.
How to tell if strut mount is bad?
Visual inspection provides the most definitive proof of failure, allowing technicians to assess the structural integrity of the suspension system’s upper pivot point without complex tools.
To determine if a strut mount is bad, inspect the rubber insulation for deep cracks, disintegration, or "pancaking," where the rubber has compressed permanently. Check the metal bearing plate for rust that compromises strength, and verify that the mount remains securely bonded, as any gap indicates critical adhesion failure.

Dive Deeper:
Understanding the anatomy of a failure requires looking beyond the surface. A strut mount acts as the sandwich layer between the vehicle’s chassis and the suspension strut. Its primary job is to cushion impacts and allow the strut to pivot during steering. When we ask "how to tell if a strut mount is bad," we are often looking for the aftermath of failed engineering—specifically, the failure of the vulcanization process.
The most common catastrophic failure we see in aftermarket parts is rubber-to-metal separation. In a high-quality strut mount, the rubber is not simply glued to the metal; it undergoes a specific vulcanization process. This involves heating the rubber and metal components under precise pressure and temperature controls to create a cross-linked atomic bond. At GSW, we utilize an optimized vulcanization cycle that ensures the rubber achieves the correct Shore Hardness A while maximizing Tensile Strength at the bond line.
When you see a "bad" mount where the rubber has peeled away from the metal sleeve, it is often a sign that the manufacturer rushed the curing phase or used inferior bonding agents. This separation eliminates the mount’s ability to absorb road shock, transferring 100% of the impact energy directly into the chassis.
Furthermore, look for "micro-cracking" versus "structural tears." Surface ozone cracking is common in older rubber, but structural tears that penetrate the material indicate that the rubber has lost its elasticity due to heat cycles and fatigue. A collapsed mount will also change the ride height slightly and alter the alignment geometry. If the mount has compressed significantly (pancaking), the camber and caster angles may shift, leading to uneven tire wear. Therefore, a bad strut mount looks like a component that has lost its dimensional stability—it is no longer holding the strut shaft in the precise center of the mounting location.
For B2B distributors, recognizing these signs is vital. Selling parts that suffer from premature vulcanization failure leads to high warranty claim rates. Ensuring your supplier uses OE-grade bonding techniques is the only way to prevent these visual defects from appearing shortly after installation.
I recently examined a batch of returned cores, and the distinction was clear: the units with intact vulcanization, even after high mileage, showed general wear but no separation. Those with poor bonding had catastrophic detachment, rendering the strut assembly useless.
What Are The Symptoms of A Bad Strut Mount?
Beyond visual defects, a bad strut mount announces itself through specific Noise, Vibration, and Harshness (NVH) issues that degrade the driving experience.
Common symptoms include a loud clunking or knocking noise when driving over bumps, a "crunching" sound when turning the steering wheel, and excessive vibration transmitted through the cabin. You may also experience "memory steer," where the car pulls to the side after a turn, indicating bearing seizure.

Dive Deeper:
The symptoms of a bad strut mount are often misdiagnosed as bad struts or sway bar links, but the nuances in the NVH (Noise, Vibration, and Harshness) profile can help pinpoint the mount as the culprit. The most prevalent symptom is a distinct auditory cue.
I recently watched a video that perfectly captures this specific diagnostic challenge. In the footage, the mechanic demonstrates a vehicle that makes a hollow "clunking" sound every time the suspension compresses over a bump or when the steering wheel is turned sharply. The video clearly isolates the sound coming from the top of the strut tower rather than the bottom control arm. It highlights how the worn bearing inside the mount causes friction and binding, leading to that characteristic "spring popping" noise as the coil spring jumps instead of rotating smoothly.
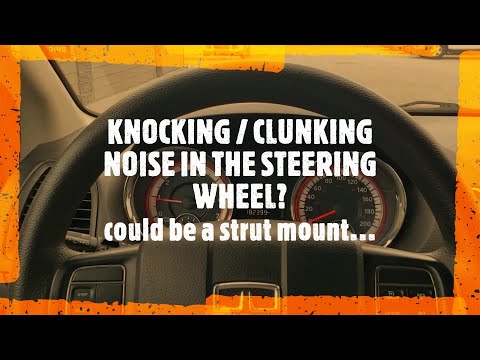
Analyzing the Symptoms:
- Clunking/Knocking: This usually occurs when the rubber isolation material has totally disintegrated or compressed. Without this buffer, you have metal-on-metal contact between the strut shaft and the mount housing. Every road imperfection sends a shockwave through the chassis, audible as a clunk.
- Steering Binding (Memory Steer): The strut mount contains a bearing (in MacPherson strut systems) that allows the strut to rotate with the wheels. If this bearing seizes due to contaminant ingress or lack of lubrication, the steering will feel heavy or "notchy." You might turn the wheel, and the car continues to pull in that direction even after you let go. This is a safety hazard as it prevents the steering from self-centering.
- Vibration: A primary function of the mount is dampening high-frequency road vibrations. When the rubber loses its damping coefficient (hysteresis), these vibrations travel up the steering column, causing the steering wheel to shake at highway speeds.
Sales Enablement Tip: When explaining this to a car owner, use the "Helmet Analogy." Explain that the strut mount is like the foam padding inside a helmet. The hard shell (the strut) takes the big hits, but without the foam padding (the mount), every impact would still hurt your head. When they hear the clunk, it’s the sound of the helmet without the padding—impacts are hitting the car’s frame directly. This usually helps customers understand why replacing a "piece of rubber" is essential for protecting the rest of the vehicle.
How to check strut mounts?
Accurate diagnosis requires a combination of stationary tests and dynamic road testing to isolate the mount from other suspension components.
To check strut mounts, perform the "Bounce Test" by pushing down on the vehicle’s corner and listening for noise, then conduct a steering sweep test with the engine running. Visually observe the strut top while a helper turns the wheel; any binding, skipping, or excessive movement indicates failure.

Dive Deeper:
Checking strut mounts requires a systematic approach because the component is under extreme tension from the coil spring. You cannot simply "wiggle" it like a tie rod end. Here is a professional diagnostic workflow designed to rule out false positives.
1. The "Clock" Position Check:
Open the hood and locate the strut towers. With the car on the ground (suspension loaded), look at the position of the central nut and the rubber surrounding it. In many designs, if the central nut is not perfectly centered within the mount housing, or if you see the rubber bulging excessively on one side, the mount has collapsed internally.
2. The Dynamic Steering Input Test:
This is best done with two people. Have one person sit in the driver’s seat and start the engine. Have them turn the steering wheel from lock to lock (full left to full right).
- The Observer’s Role: Stand by the open hood and watch the top of the strut mount. Place your hand carefully on the spring (if accessible and safe) or the strut tower.
- What to feel for: You are looking for smooth rotation. If the strut mount bearing is bad, the spring will not turn smoothly; it will "stutter" or "pop" as it builds up tension and releases it. You will feel this vibration distinctly through the spring. If the mount moves excessively laterally (side-to-side) rather than just pivoting, the rubber bushing is shot.
3. The Bounce Test (Auditory Focus):
Push down rhythmically on the corner of the car above the wheel. While this is usually used to test the strut cartridge (damping), you are listening for noise here. A squeak or crunch from the top of the tower during this low-speed compression suggests the rubber is rubbing against metal or the bearing is dry.
4. Lift Inspection:
When the car is on a lift, the suspension hangs. This "unloaded" state can reveal cracks that are hidden when the car is on the ground. Grab the coil spring and try to move the strut assembly up and down. There should be zero vertical play. If the whole assembly creates a clunking sound when you lift it manually, the mount has lost its vertical hold.
Diagnosing this correctly prevents "parts cannon" repair—where mechanics replace the strut but leave the old mount, only to have the noise persist. At GSW, we always recommend checking the mount first when NVH complaints arise.
How Do You Replace A Strut Mount?
Replacing a strut mount is a labor-intensive process that involves disassembling the strut assembly, making safety and procedure paramount.
To replace a strut mount, remove the strut assembly from the vehicle, safely compress the coil spring using a heavy-duty spring compressor, remove the top retaining nut, and swap the old mount for the new one. Always replace strut mounts in pairs to ensure consistent handling and ride height.

Dive Deeper:
The replacement of a strut mount is technically a "strut overhaul." Because the labor time involved in removing the strut assembly is significant (often 1.5 to 3 hours per side depending on the vehicle), the industry best practice is to never replace a strut without replacing the mount, and vice versa.
The Process & Safety:
The most critical step involves the coil spring. The energy stored in a compressed automotive coil spring is sufficient to cause severe injury or death. Using a high-quality wall-mounted spring compressor or a reputable hydraulic clam-shell compressor is non-negotiable.
- Marking Alignment: Before removal, mark the position of the eccentric bolts (camber bolts) to preserve the alignment settings as much as possible.
- Disassembly: Once the spring is compressed and tension is off the top hat, the central nut is removed. This is where you will see the true state of the old mount. often, the bearing falls apart in the technician’s hands.
- Installation & Torque: Install the new GSW mount. It is vital to torque the top nut to the manufacturer’s specification. Over-torquing can crush the new bearing or strip the threads, while under-torquing causes immediate clunking noises.
Why "Quick Struts" vs. Individual Mounts?
While "loaded struts" (pre-assembled) are popular for DIYers, professional shops often prefer retaining the original high-quality coil spring and just replacing the strut and the mount. This is where GSW’s product quality shines. Our mounts are engineered to match OEM geometry exactly. If a replacement mount has slightly different dimensions (e.g., the bolt pattern is 1mm off or the stack height is different), it will ruin the vehicle’s wheel alignment (Camber/Caster).
The Importance of Pairs:
Rubber degrades with time and oxidation, not just mileage. If the left mount has failed due to rubber hardening, the right mount is chemically identical and just as old. Replacing only one side will result in uneven damping and potentially uneven ride height, leading to steering pull.
CAE Analysis (Computer-Aided Engineering) shows that an imbalance in upper mount stiffness between the left and right sides can negatively affect the vehicle’s transient response during emergency lane changes. For the safety of the end-user, always recommend pairs.
Conclusion
A bad strut mount manifests through visual cracks, rubber-metal separation, and distinct clunking noises or steering binding. Identifying these signs early prevents damage to the suspension system. For distributors, choosing mounts with superior vulcanization and precise tolerances is key to customer satisfaction. Would you like me to analyze your current strut mount inventory for common failure points?
About the Author
Root is a Content & Operations Specialist at GSWAUTOPARTS with 5 years of industry experience. Leveraging his close proximity to our manufacturing floor, Root specializes in documenting product details and production processes. He focuses on translating technical insights about rubber and chassis parts into clear, helpful information for our customers.


